Looking for professional real estate photography tips that you can put to use today? Read On!
“Wow, great photo. You must have a nice camera” – How many times have you heard someone say this? Perhaps you’re guilty of it yourself.
Many people think that the secret to professional real estate photography is owning a ‘nice camera’. As a matter of fact, many assume that having a nice camera guarantees capturing nice photos in general.
We all know that a ‘nice camera’ also comes at a pretty nice penny. However, the reality is that you’ll need more than a bank-breaking piece of equipment to take professional looking interior photos.
A good starting point for any photographer pursuing real estate photography would be to follow the fundamental interior photography tips – or at least be aware of them.
Over the years I have had several ah-ha moments while photographing properties. Every time I had one of these profound moments I would see a significant improvement in the quality and professionalism of my photos the very next day.

Most of the corrections that I’ve made now seem so obvious in hindsight, but as they say, ‘hindsight is always 20/20’. Hopefully by following these 5 fundamental real estate photography tips you can fast track your way to taking more professional interior photos.
1) Gearing Up For Success – Using the right tools
Ok, so I just started off by saying that it will take more than just a pricey camera to take great interior real estate photos, yet my very first tip has to do with choosing a camera.
But don’t judge just yet….keep reading!
Although you don’t need the latest and greatest camera on the market, you do need a reliable camera with some basic features.
The Camera: For starters, I highly recommend using a DSLR camera (digital single-lens reflex) in Manual mode. Using a DSLR in Manual Mode will allow you to control the exposure, depth of field, and ISO of your photos.
In simple non-photography terms, you will be able to control the amount of light you give to your photos and determine which things stays in and out of focus.
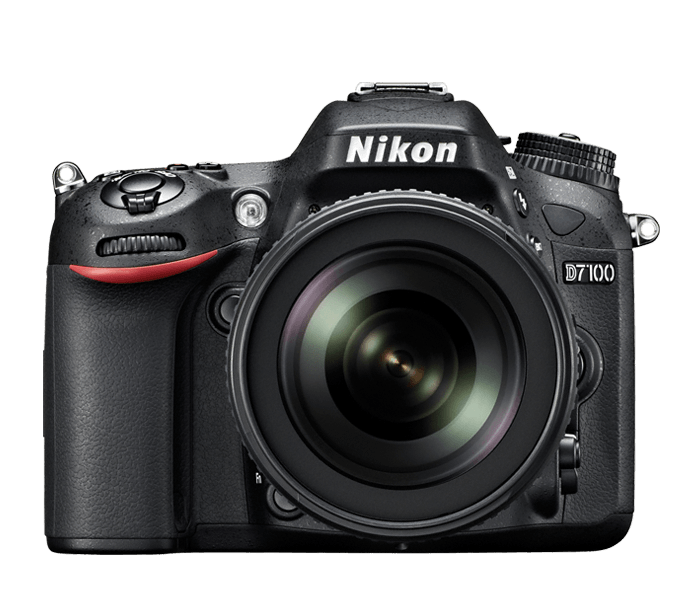
Another feature that I find really useful to have is the auto/exposure bracketing function. Not all cameras offer this feature, so if you are considering purchasing a camera with the purpose of pursuing interior photography, be sure to check if it offers ‘auto-bracketing’.
Exposure Bracketing allows you to take 3 or more photos of the scene at different exposures. Originally the function was used as a fail-safe of sorts. You could take several photos and choose the one with the best exposure.
Where real estate photography is concerned, taking a bracket of photos is very beneficial when it comes time to edit. For example, taking a photo of a kitchen at 3 different exposures will give you one photo with relatively balanced light, another overexposed (a lot of light), and a third underexposed (too little light).
When you’re editing the photo of the kitchen in Photoshop or Lightroom, you can use the balanced photo as a base and the other two photos as layers to correct under and over exposed areas.
See this short video I made to explain how you can use exposure bracketing for interior real estate photography.
The Lens: I use a 10-20mm Sigma wide angle lens and a 35mm Nikon prime lens. The wide angle lens is necessary for taking shots of very small spaces and for showing an entire room in a single photo.
The Nikon 35mm price lens is my go-to lens for close ups and when I am photographing wider spaces that don’t require a wide angle. As a matter of fact, I prefer using this lens over the 10-20mm when space permits. The reason is that it produces less barreling and lens distortion than the wide angle lens.
The Tripod: The use of a stable tripod is absolutely necessary for taking crisp professional-looking interior photographs.
MORE STABILITY = LESS SHAKE = SHARPER PICTURES
In general, the more stable your camera is, the sharper your photos will look. Lighting can be very limited when photographing a property. Some rooms have very limited natural light entering from the windows, so shooting with a tripod is essential.
Mounting your camera on a tripod will allow you to use long shutter speeds that would be otherwise impossible if you were shooting handheld.
A Remote Shutter Release: These little gadgets are extremely affordable and will help you to take sharper images with less camera shake. The more expensive versions are wireless and allow you to fire your camera from far distances. However, I have been using a wired $26.00 Nikon MC-DC2 Remote Release Cord for years now with zero complaints.
Additional Lighting: Although I am a fan of natural lighting, using supplementary artificial lighting is sometimes necessary. I recommend having at least one flash unit that you can use off-camera to bounce light off of adjacent walls. Did I lose you there? If you want to learn more about this technique, I will be doing a follow up post shortly to delve deeper into lighting a room with off camera flashes.
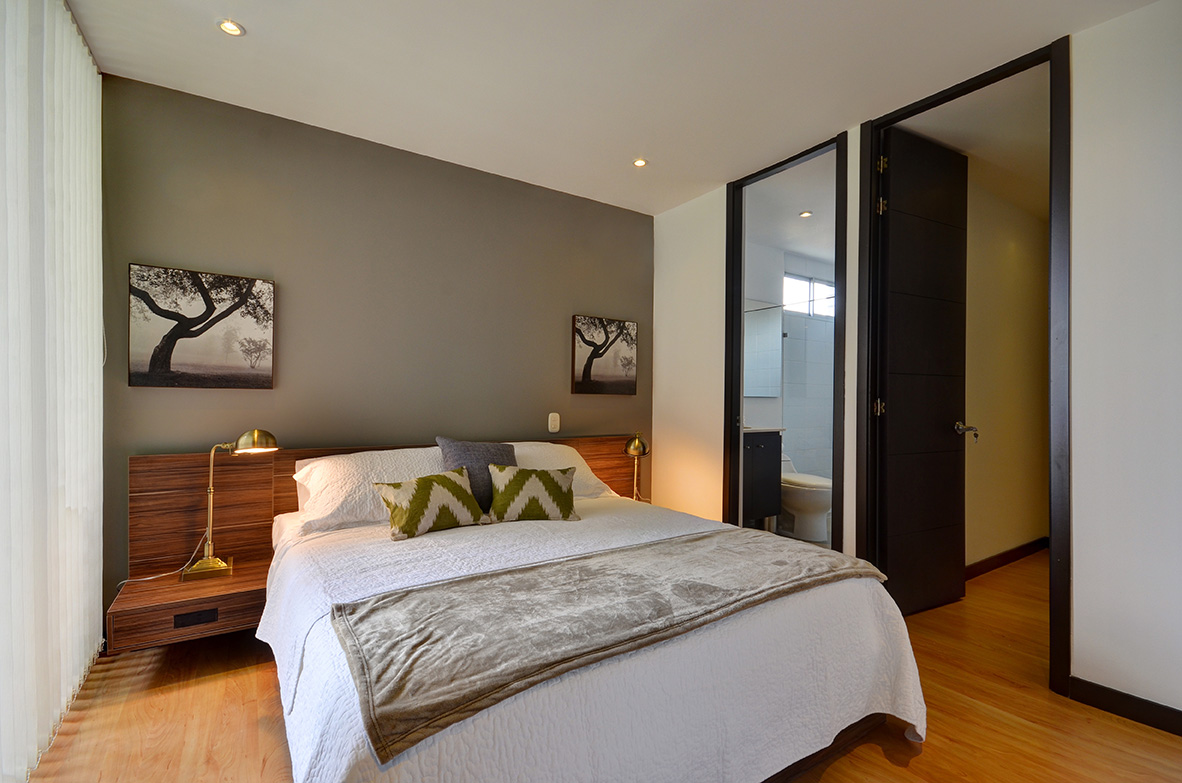
2) Straighten Up – Keep Those Vertical Lines Vertical
Looking back at my early interior photos, I literally feel nauseous and outright embarrassed to claim them as my work.
Most of the photos have what I call ‘drunken walls’. That’s when the vertical lines in the room look like they chugged down a litre of vodka and are fighting for dear life not to topple over.
The first and biggest change in my photos came about when I realized that I could position my body and the camera to make sure that the vertical lines in a room all stayed straight.
Although I regrettably don’t own a tilt-shift lens which does most of the straightening for the photographer, I have developed my own technique for keeping things straight when I photograph. This is when that stable tripod that I recommended will come in handy.
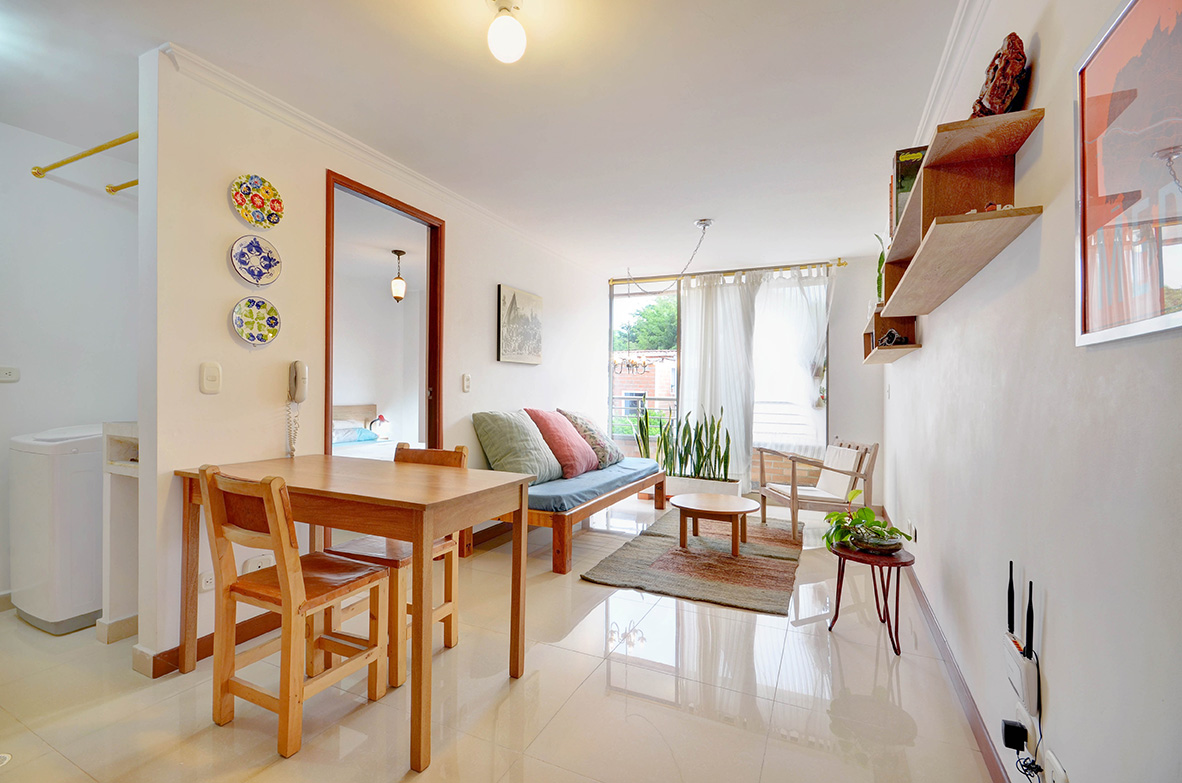
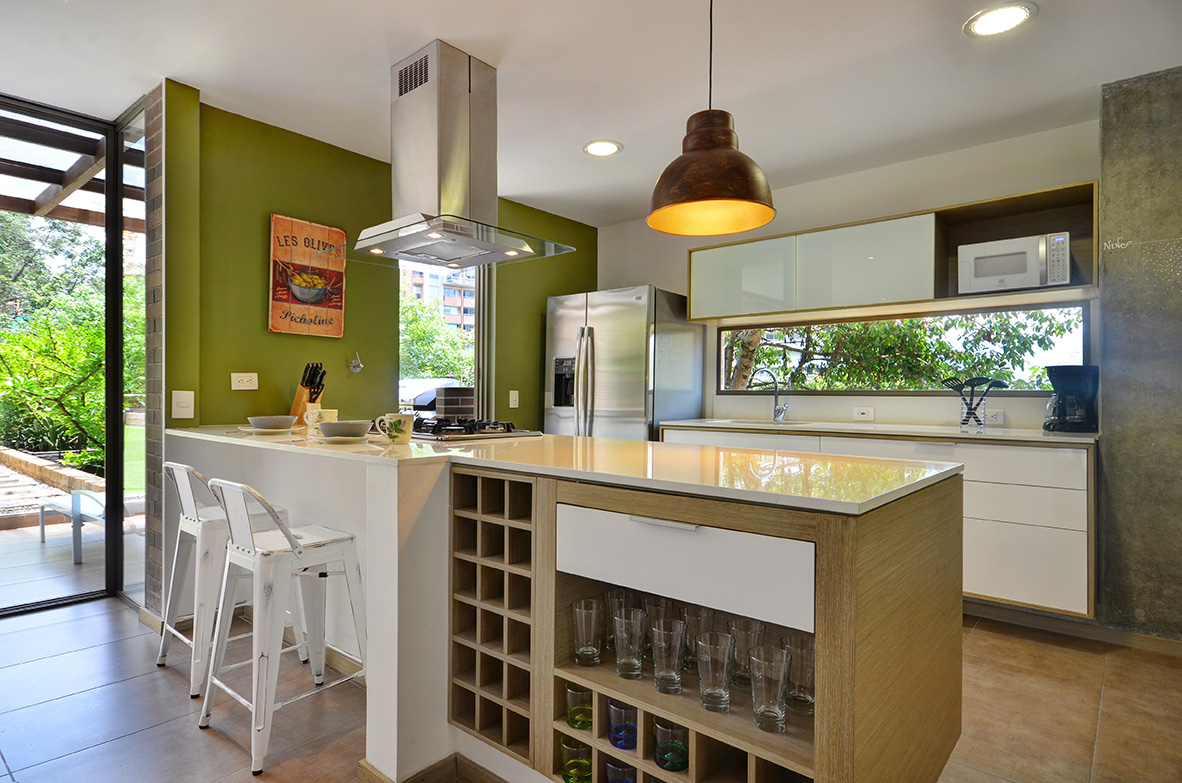
Remember to Act Like A Child: A key to keeping lines straight is the perspective from which you take the photo. If you flip through an interior design magazine you will notice that the majority of photos are taken from a lower position – as if the photographer was in a crouched position.
I am 6’0 ft tall and my camera is normally mounted at about my lower chest level – approximately 4 feet off the ground. By lowering your camera to this level (and sometimes even lower) you will notice that the vertical lines in the room begin to straighten out a bit. Take your interior shots from a child’s perspective!
The second step is to look at the vertical lines at the extreme left and right of your frame. If your tripod allows rotation in all angles (vertically, horizontally and diagonally) you will be able to manually straighten out the vertical lines in your frame by tilting the camera until the lines at the extremities are vertical.
Note: Depending on the lens you are using, it may be impossible to take a photo where all of the lines are perfectly vertical. For example, using a wide angle lens will most likely cause what is called ‘barrelling’ or ‘lens distortion’. This is when the vertical lines begin to curve inwards like the shape of a barrel. The smaller the room, the more visible the bending of the vertical lines will be. Here is a little video I made to show you how to edit bent and curved lines inPhotoshop.
3) Keep It Clean – Declutter Because More is Less
Have you ever heard someone say that a good photo is more about what’s excluded from it and not what’s included in it?
The first time I heard this I thought that the photographer was trying to sound deep and philosophical, but now I completely agree with him – especially where interior photography is concerned.
A good interior photo should tell an interesting story. The objects in a room all add to that story and help to create a desired ambience. However, those very objects can distract from the story and interrupt the viewer’s flow – sort of like when a writer throws in those big unpronounceable words that we’ve never seen before.
The key is to not crowd your photo with distracting objects that don’t add to your story.
Remember if something in your photo is distracting to you, it will most likely be distracting to viewers. So don’t be afraid to move things around or take them completely out of the room if they don’t add benefit.
Sometimes you will find heavy pieces of furniture or fragile decorations that you just can’t take out of the room. In that case, you will have to move yourself. By changing your perspective and angle, you can virtually eliminate or minimize how much attention a particular object gets in your photo.
4) Timing is Everything – Play nice with the Sun
Assuming that you aren’t a master of artificial lighting just yet, you will need to make the best use of natural sunlight.
As with most types of photography, shooting at or around sunrise and sunset will produce the best results for interior photography. If you are going to schedule a photo session make sure you use these timeframes to your advantage.
So why is it easier to photograph during these hours?
At first, I used to photograph properties at all odd hours of day – sometimes even at high noon. The problem is that my photos would always suffer from big disturbing shadows or completely white, blown out windows. I was in a constant battle with the sun.
When you take a photograph you set your exposure for your subject. If you were taking a portrait photo, you would set your exposure for the person’s face. In interior photography you set the expose for the room. However, you also have to take the sun’s light into consideration.
I had one of those Ah-Ha moments when I decided that I would stop fighting with the sun and make nice by following its schedule.
If you photograph when the sun is really bright, too much light enters the windows and they appear white and blown out. If you photograph when there is no sunlight the windows begin to reflect the interior lights and everything else in the room.

When you take a photo during the magic hours as they are called, you can achieve more balance between the light provided by the sun and the internal lighting of the property.
5) Shoot towards the corners & watch your depth of field
When photographing a room, try aiming towards the corners where two walls meet. This helps to add more depth and perspective to your photos. It will look more three dimensional and less flat and boring.
Speaking of depth….
You now have your camera mounted on a tripod, shooting from a child’s perspective during the magic hour, and aiming towards the corners of the room. Now what is a good aperture to set your camera to?
I set my camera’s aperture (depth of field) to F11 for most residential interior photos. At this depth of field, most of the furniture and decoration in room stays sharp and in focus. I will sometimes set my aperture to F4 when I want to focus on a specific feature/fixture in a room and have everything else slightly out of focus.
A BONUS TO THE OTHER 5 REAL ESTATE PHOTOGRAPHY TIPS – Be Creative
Even as you follow these interior photography tips, it’s important to let your creativity roam. Photography is an art and such calls for your own creativity in each situation. No two spaces are the same. Approach each from a unique angle. Play around with different light settings, different apertures, and different object arrangements until you achieve the best shot.